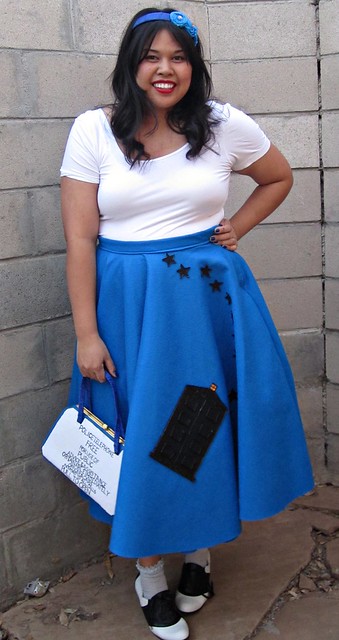
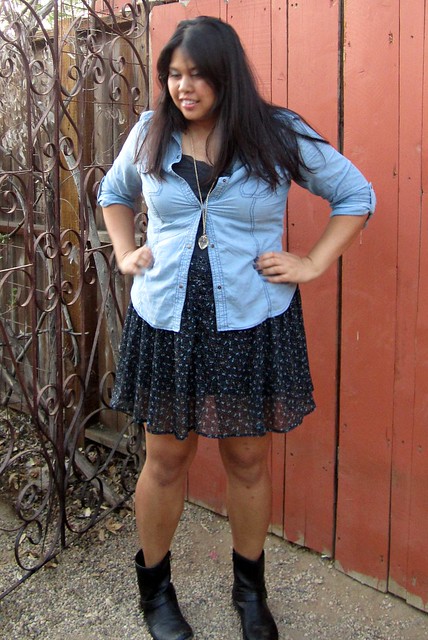
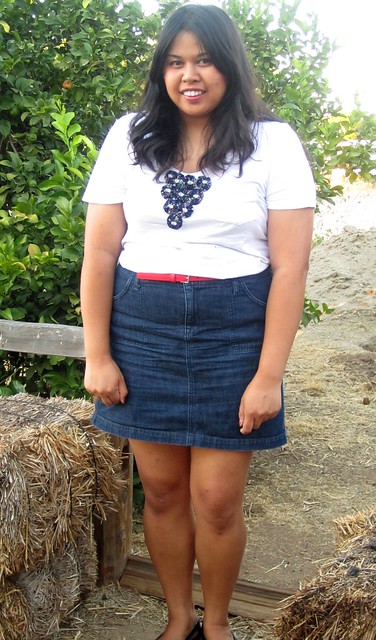
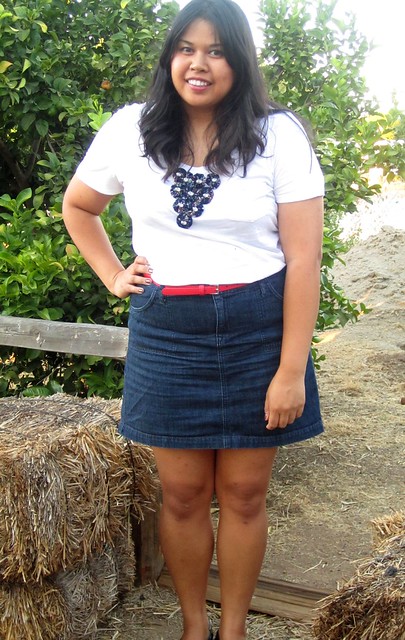
Showing posts with label sewing. Show all posts

Wednesday, November 18, 2015

30 Days of Star Wars: Creating my R2-D2 Costume: Part One

I'm currently taking a costuming class at my local community college and our final project is a costume of our design from our chosen era. Since I knew I wanted to make a new costume to wear for Star Wars, I decided to make an R2-D2 costume, re-imagined in the 1950s.

Upon talking to my teacher, she pointed me in the direction of researching sci-fi films from the 1950s. Here are some of my inspirations for the costume. Once I have it finalized, then I can do the fun part, looking for the items to create it!


Friday, December 9, 2011

Decisions, Decisions

With two weeks before Christmas, I have this slightly crazy plan that where I want to sew my dress I'll be wearing on the 25th. I have some sewing patterns and cloth just hanging out in my room and that just calling to be used. Plus I remember my mom sewing me and my sister's Christmas outfits when we were little, so it'll be nice to start that up again.
The thing is, there are three dresses that I want to sew, but I can't seem to pick one. So this is where you come in. I'll be doing a poll on where you get to pick which dress I will sew and I'll document the progress on the blog. 

Here are the three choices:


And this is the fabric I'll be using:

It's Halloween costume fabric I got last year and I thought it would be pretty fabric to make a dress out of. Plus I'm a sucker for star prints.

I put a poll in my side bar and you can vote on the pattern until Monday. Can't wait to see what everyone picks!

Thursday, November 3, 2011

Whovian Wednesdays Bonus Post: My TARDIS Costume

 TARDIS Costume_6
Top: Old Navy
Skirt and Headband: Self-made
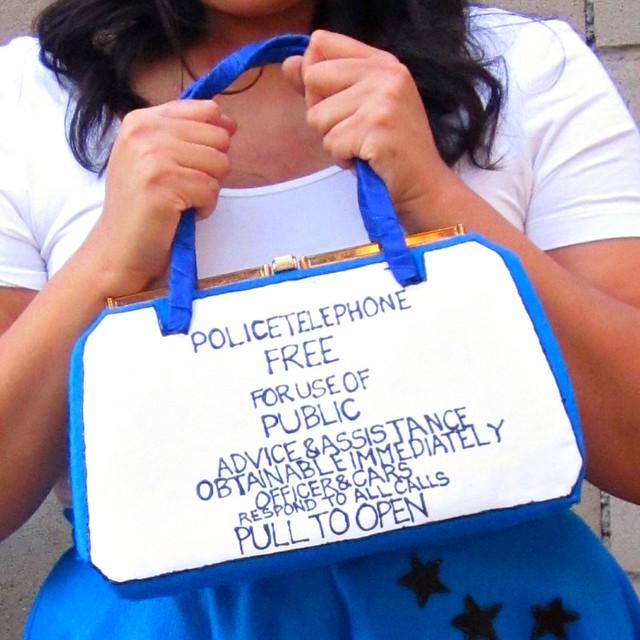
Purse: Thrifted and re-worked
Socks: Target
Saddle Shoes: Bass
TARDIS Costume_3

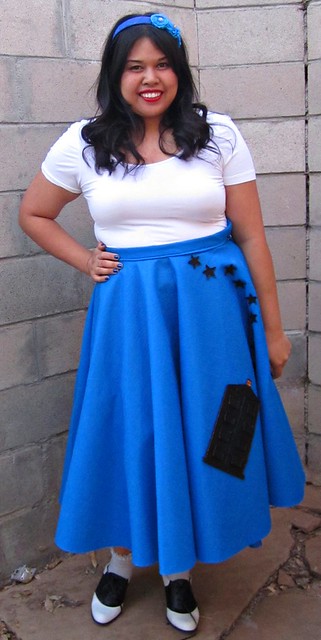
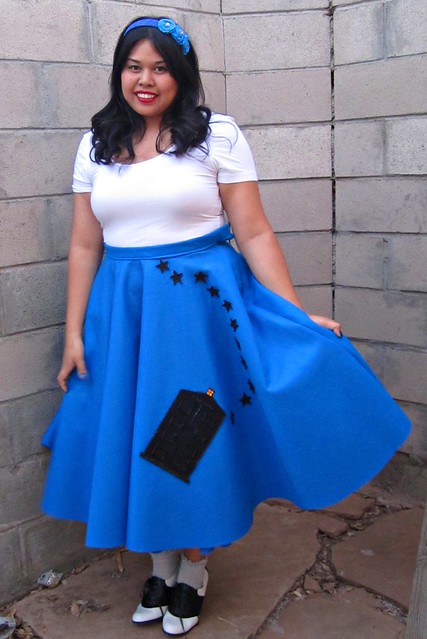
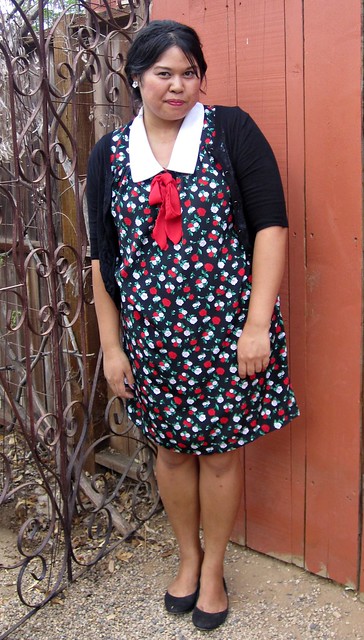
After many hours and a some revisions, here is what I wore for Halloween, my 50's inspired TARDIS costume. The skirt wasn't too hard to make besides having to sew the zipper which I'm still a novice at, but it was everything else that took a lot of time. The petticoat was the most time consuming, having to sew the rows and rows of tulle, but I like it much better than having to buy one. 


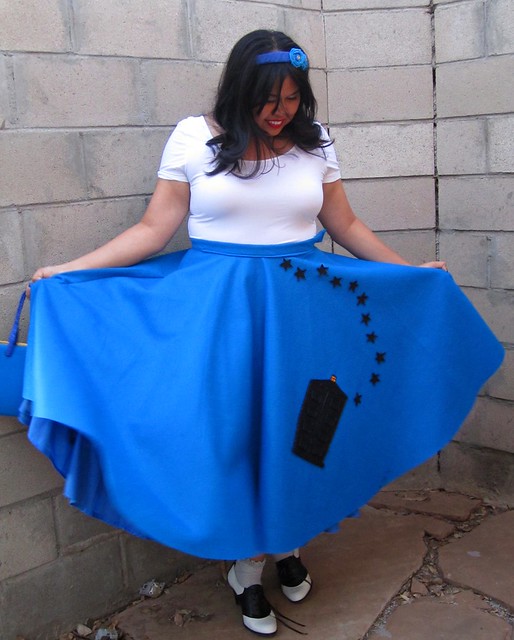
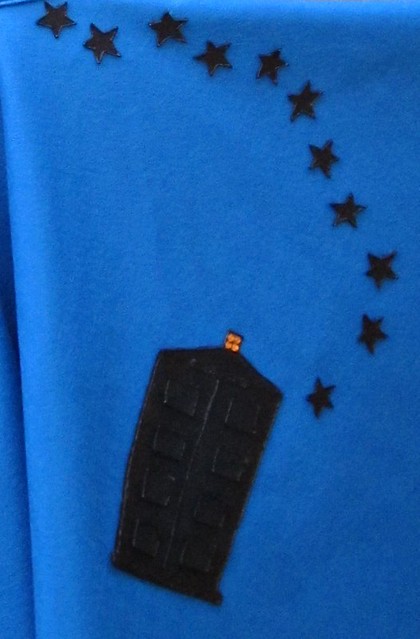
Then it came to how I was going to decorate the skirt. At first I wanted it to be like the TARDIS with panels on the front of the skirt. Instead, I decided to make a mimic the poodle appliques that usually are on a skirt like this. I made a TARDIS applique and had eleven stars following it. The stars represent the eleven Doctors.

TARDIS Costume _1

TARDIS Costume_5

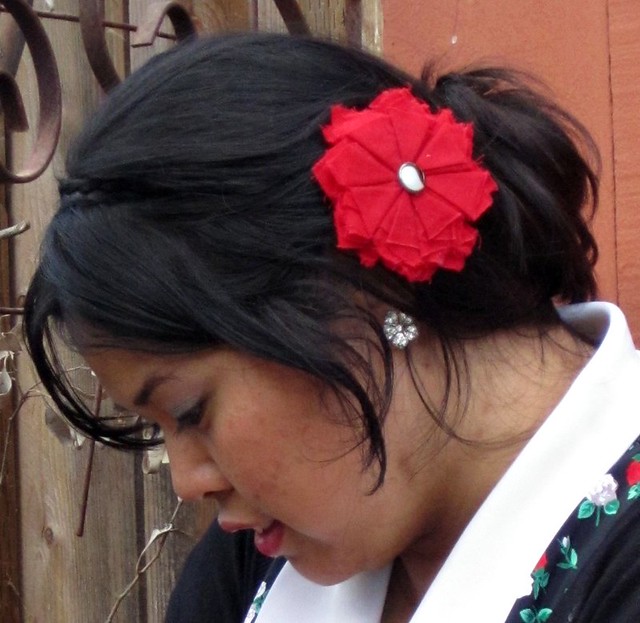
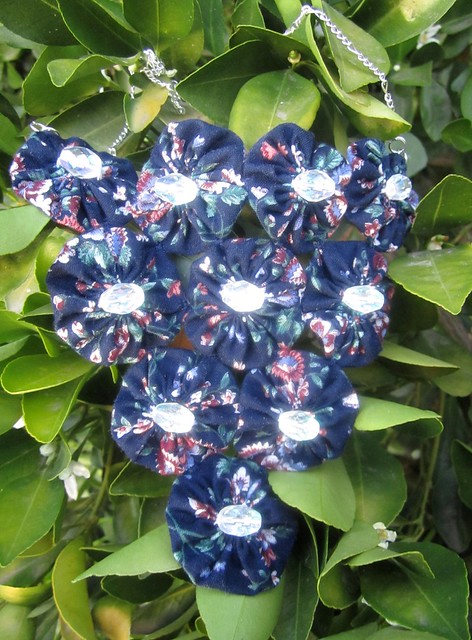
I tried making two different type of light toppers for my head, but I wasn't feeling them. So I made some flowers out of the leftover felt, covered it with glitter, and yellow gems on the center part. The final thing was this purse made to look like the Police sign. I took a plain structured bag and covered it with felt and wrapped the handles with ribbon. I then took some white cloth to write out the sign. 

TARDIS Costume_7 


 TARDIS Costume_2
Overall I really like the way it turned out and now I have a costume I can wear to conventions. I'm also thinking of sewing up another skirt, perhaps a Guild version.

I also wanted to mention that I am the new Admin for the Tumblr site Matt Smith in Places He Shouldn't Be. It's the same as the David Tennant site, but with the 11th Doctor. The site has changed a lot of hands since it was created last month, I'm their third Admin, but I'll be there for the long haul. So follow me there and you can always submit things to the site.

Saturday, October 8, 2011

Weekend Plans

 Sewing my Halloween costume

Going to start read these

Adding this and some other goodies to the shop.

Have a great weekend!

Wednesday, September 28, 2011

Whovian Wednesdays: DIY TARDIS Bag

Since I've been writing about Doctor Who a lot lately, I thought I should make it a weekly column for all things Whovian. It's also a way to limit how much I talk about it here, so you dear readers don't sick of me writing about it. :P
For my first Whovian Wednesday post I want to show off a project I've been working on for the past week, my TARDIS totebag. I'm extremely happy with the way the bag turned out because on my first attempt I didn't do the proper measurements for the front piece and it looked like crap. So for my second attempt, I spent more time mapping out how I was going to recreate the front of the bag and it came out much better. There are still some things I want to improve for the next time I make one, but with doing any first time project, there's always crafting lessons to be learned. I plan on making another bag to either put in my shop or as a giveaway. Haven't decided yet.

 Measuring out the front door panels of the bag

The windows and police box sign

The front panel assembled 

TARDIS bag detail

The finished bag! Oh and it's bigger on the inside. ;P

Tuesday, September 27, 2011

The 90's Called and They Want This Outfit Back

whatiwore.09.27.11_3
Chambray Button-Up and Tank (underneath): Old Navy
Skirt: Charlotte Russe
Necklace and Boots: Forever 21

whatiwore.09.27.11_2

Sunday was the first day I broke out my boots which might have not been the best idea because later on it got really warm. I know talking about the weather is the most boring topic to blog about, but I'm seriously looking forward to cooler weather and I'm tired of this never ending heat. Right now it's 97 degrees. So not fall weather. This outfit is the total opposite of my last outfit post. Channeling some 90's grunge/hipster with this one. I wish I wore something like this in middle school instead of some of the unfortunate outfit choices I made back then. I remember spending a good part of 7th grade wearing baggy jeans, flannel and boots. Not really that flattering.

 whatiwore.09.27.11_4

Anyhoo, I finally finished some sewing projects with one of them I'm extremely proud of. I'm catching up on my reading by trying to spend at least 30 minutes reading and away from the computer, which can be such a time waster (I have a slight Tumblr addiction). I'll be done with Bossypants and will start reading The Hitchhikers Guide to the Galaxy next. Also have some other things to post about, just have to make sure procrastination and laziness doesn't get a hold of me.


Friday, September 23, 2011

Visual Friend Friday: Re-working It

whatiwore.09.23.11
Dress: Goodwill (altered)
Cardigan and Earrings: Express
Flower: Hive & Honey
Wedges: Payless

There are pieces in our closet that we would love to wear, but for whatever reason they never seem to look right on us. The first thing we might have in mind is to chuck it or keep in buried in our closet to never see the light of day. But sometimes, the piece just needs a little nip and a tuck in order for it to be wearable again.

Much like the case with the dress turn skirt in the last post, I made some quick alterations to turn this over sized dress that I found hidden in the racks at my local Goodwill....

dressbefore

To this...

dressafter

I basically took the sleeves off, took about an inch from the sides and hemmed it to knee-length. Although I'm thinking of making it an inch shorter. I have a similar dress like this but in a different pattern, so I'm thinking they were hand made. They were also well worn because I found some parts of the dress that looked like it was repaired. 

 whatiwore.09.23.11_2
whatiwore.09.23.11_detail

I paired the dress with a flower fascinator I purchased from Hive & Honey. You should check out Kaelah's shop. There are so many cute hair accessorizes there. 

Have you ever altered a piece of clothing in order to make it more wearable?


Tuesday, September 20, 2011

Indian Summer

whatiwore.09.17.11
Cardigan, Skirt (re-worked dress), and belt: Old Navy
Tank: Alternative Apparel (won from Cheer contest)
Sandals: Hot Kiss via Famous Footwear

whatiwore.09.17.11_2

It may be the middle of September, but it still feels like August. I'm just ready for fall or cooler weather in general. My skirt was originally a dress but the top was not fitting right at all. I was about to put this in my give away pile when thought why not make change it to a skirt. It already had a elastic waistband so all I needed was a seam ripper and some sewing and now I have new skirt to wear. This little project is preparing me for this weeks visual Friend Friday where we showcase a reworked item, for I have a dress I've been wanting to alter for a while. Gotta get that started ASAP!


Saturday, September 10, 2011

That's Crafty! - How To Make Fabric Doilies

Last month, I wrote about the necklace I made from fabric doilies. I ended up getting a request from Jennifer of One Girl Geek on making a tutorial for it. So here it is!


What you'll need:
  • fabric (preferably cotton or cotton/blend)
  • needle and thread
  • some heavy paper or poster board
  • various circular lids
  • pencil or pen
  • scissors
  • straight pins (optional)


 Step One
Gather various sizes of circular lids (you can even use old cds) and trace the pattern on heavy paper or poster board. This will make the patterns last longer. I used old paper dividers for my patterns. You can make the patterns as big as you like but for smaller circles you don't want to go smaller than 2 3/4". Anything smaller will make it more difficult to assemble. Cut out the patterns.


Step Two
Lay the fabric on a flat surface and trace the patterns out with a pencil. You can also use a ball-point pen since the markings won't show, but don't use a marker since it will bleed into the fabric. Try to get the patterns as close as you can so you don't have lots of fabric remnants. The leftover fabric can be used for other projects or if you have a covered-button maker, you can use the scraps to make buttons for the middle of the doilies. You can make the doilies out of lace, tulle or any other lightweight fabric, but you'll have to stack the fabric on top of each other and pin the pattern to the fabric and cut around it. 


Step Three
Once you cut out the fabric, grab your needle and thread. As with any sewing project, you want your thread to match the fabric. It's also important that you have a really good medium sized knot. Anything smaller will break through the fabric as you are gathering. Also be careful with the needle. I have poked myself a few times and it's never fun. 
Your going to fold over a small piece of the fabric and do a running stitch. As you are doing this, you'll gather the top fabric together. Keep doing these two steps until you reached the starting point of the stitch.


Step Four
Once you reached the starting point of the stitch, make sure the gathering is tight. Once that is done, run the needle from one of the gathers to the center a few times just make sure it won't unravel. After knotting it two-three times, you have yourself a doily.


You can use them to make necklaces, or depending on the size, you can even use them to make pillow covers, coverlets or even as clothing. This is also a good way to up-cycle a favorite piece of clothing that is beyond repair. The possibilities are endless! 


If you do decided to make these doilies e-mail me pictures and I'll post them on the blog. I would love to see to what you craft out of them!


Thursday, August 4, 2011

Getting Crafty

whatiwore.08.04.11_2
Tee, Tank (underneath), denim skirt and belt: Old Navy
Necklace: Handmade
Sandals: Payless

whatiwore.08.04.11
 I might have to blame the Doctor on my burst of creativity this past week. You see usually when I'm at home watching TV I have to do something to keep myself busy but not be distracted from what I'm watching. But I don't know how to knit and cross-stitching would require more focus. So while on my Doctor Who marathon, I decided to make some necklaces out of fabric doilies. 

When I was younger, one of the first sewing projects my mom taught me was making this circular fabric pieces that she called doilies. Basically what you would do is take a piece of circular fabric and while folding the edges you would do a running stitch along the fold. I thought it was the coolest thing ever and I would make a bunch of them. But never really knowing what to do with them, they sat unused.
Then last year I saw a necklace on Madewell's site and thought, I can make something like that. So I bought some chain and findings but I still didn't do anything with it. It wasn't until last week that I decided to finally make a necklace and it has been non-stop ever since.

 Handmade Necklace

The one I'm wearing is the first one I made and I'm really proud of it. It goes to show that you can make a basic tee look less than casual with a standout piece of jewelry. I even found a box of fabric that I haven't gone through since our family moved 7 years ago. So I'll be experimenting with different fabrics and designs. Maybe this can even be another Etsy venture for me along with some other crafting ideas I currently have in mind. We'll see about that.